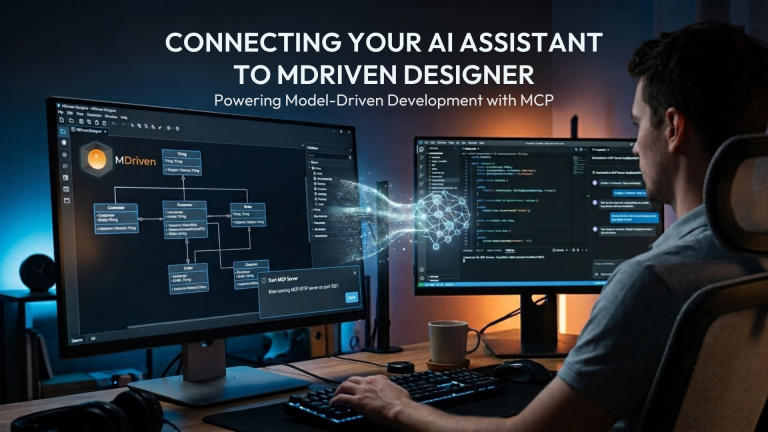
Stop Typing, Start Prompting: Automating Low-Code Architecture with MCP
Model-driven architecture accelerates software design, but integrating generative AI shifts that speed into overdrive. By leveraging the Model Context Protocol (MCP), you can bridge the gap between your AI assistant and your domain models. Setting up an MCP listening server directly within MDriven Designer transforms your AI client from a generic code generator into an active, context-aware participant in your system design.
This guide walks through the complete workflow to turn your AI into a dedicated modeling partner. We will cover the end-to-end process: configuring the MCP server in MDriven, establishing a live connection with your AI workspace (such as VS Code), and using natural language prompts to instantly generate, modify, and refine your models.
Step 1: Starting the MCP Server in MDriven Designer
MDriven Designer has built-in features to make exposing your model to AI clients incredibly straightforward. Here is exactly how to spin up the listening server:
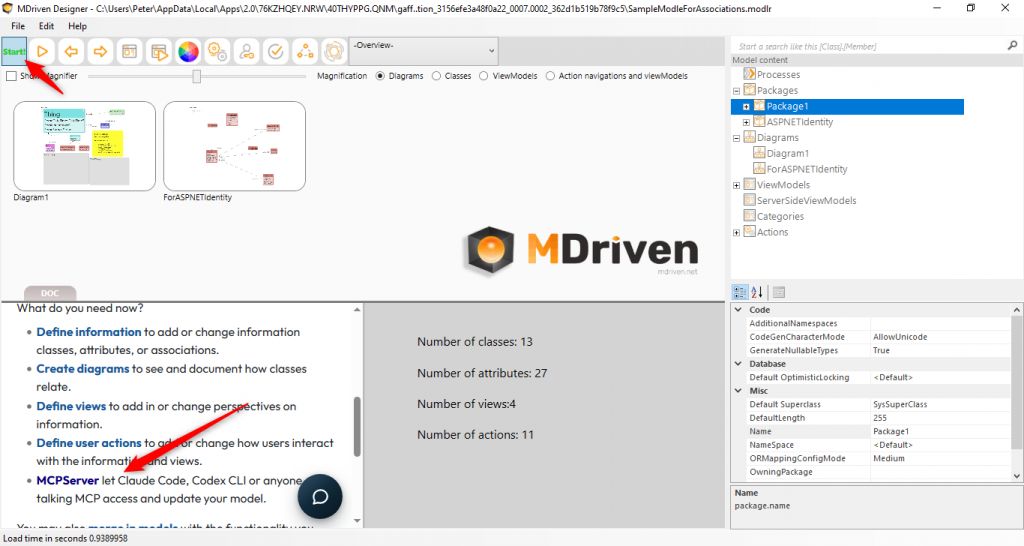
- Launch the MCP Server Interface: In MDriven Designer, click the Start! button in the top menu and select MCPServer from the options. This feature is specifically designed to let AI tools like Claude Code or Codex CLI access and update your model.
2. Configure the Port: In the MCP Server settings panel, specify the MCP Port you want to use (for example, port 5021). This will create a local address like http://localhost:5021.
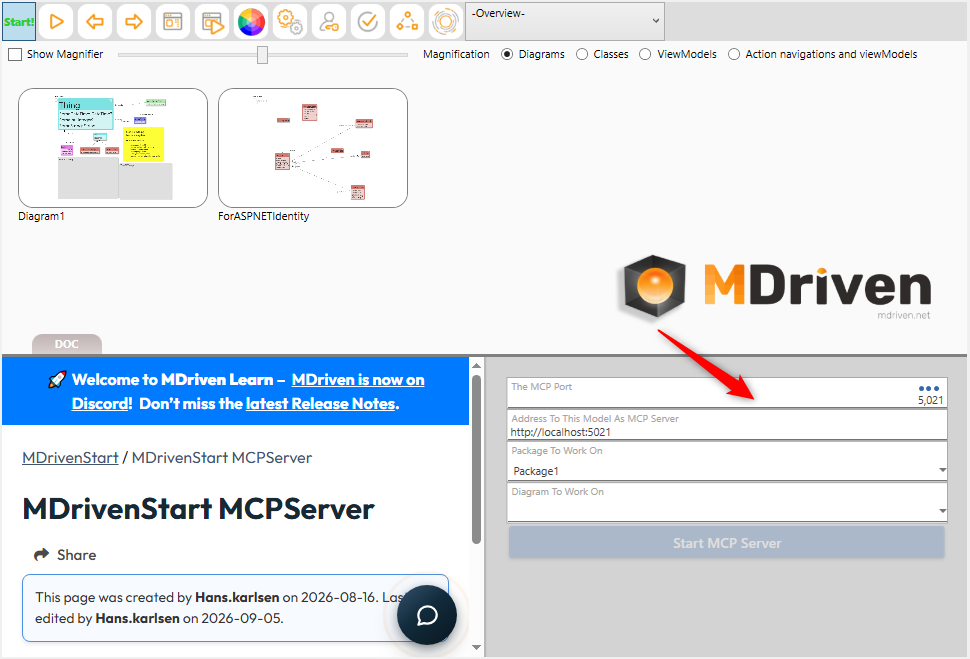
3. Select Your Target Context: Choose the specific Package To Work On (e.g., Package1) and the Diagram To Work On (e.g., Diagram1) so the AI knows exactly where to focus its changes.
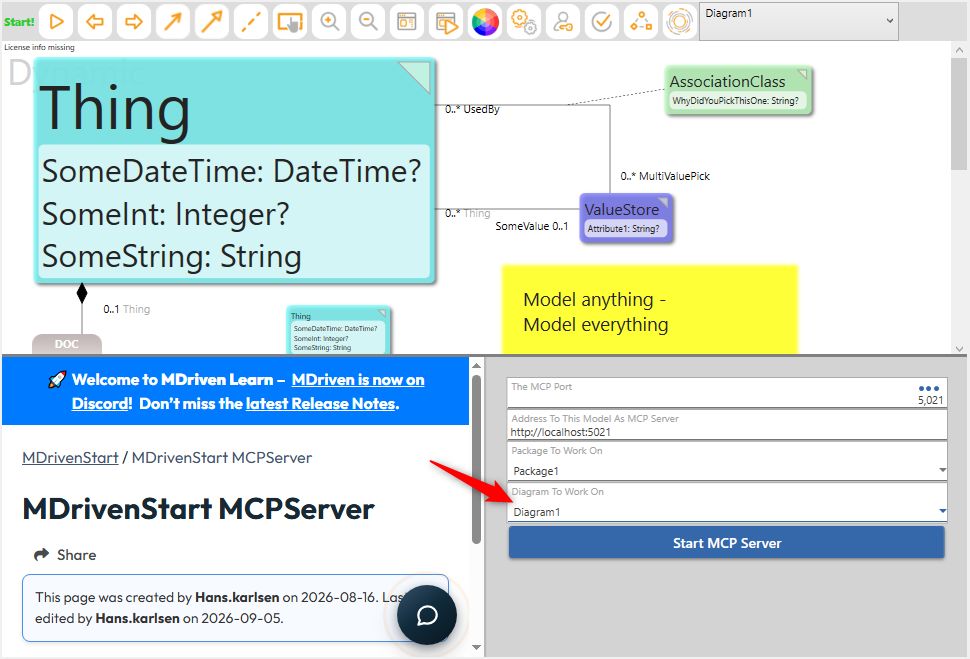
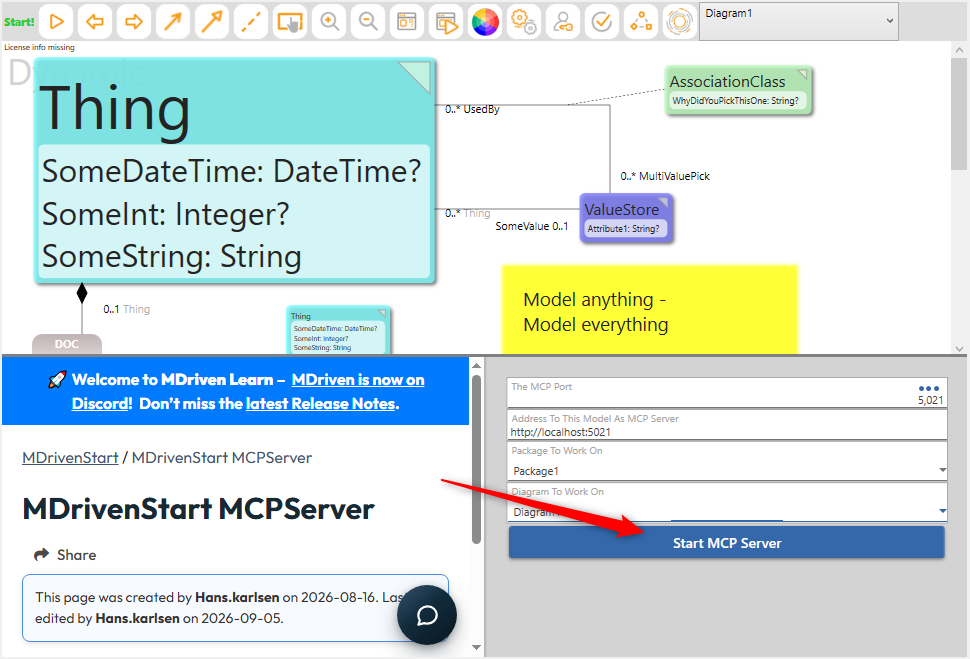
4. Initialize the Server: Click the large blue Start MCP Server button.
5. Confirm Connection: You will see a success dialogue box confirming that the system is “Now running MCP HTTP server on port 5021”.
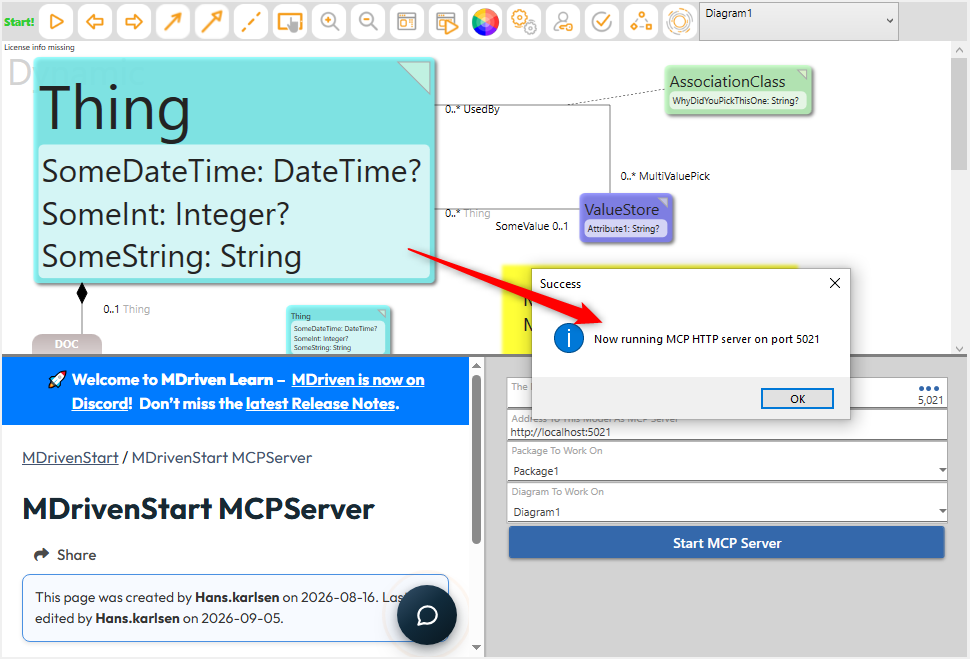
Your MDriven model is now actively listening for commands.
Setting Up MCP Server
Step 2: Connecting Your AI Assistant to the MDriven MCP Server
With your MDriven listening server up and running, the next step is to connect your AI client so it can start communicating with your model. Because MDriven exposes a standard Model Context Protocol HTTP endpoint (running on http://localhost:5021), any MCP-compatible client—such as Claude Code, Codex CLI, or an MCP-enabled VS Code extension—can connect to it. This enables AI system design.
Here is how to route your AI to your newly created MDriven server:
- Open Your AI Environment: Launch your preferred AI client or IDE (for example, VS Code with an MCP-compatible agent or the Claude desktop app).
- Access the MCP Configuration: Locate your client’s server connection settings. In VS Code, this often involves editing your workspace’s
.vscode/mcp.jsonfile or using the command palette to “Add Server”. - Point to the MDriven Endpoint: Configure your client to connect to the HTTP server address generated by MDriven in Step 1. You will use the exact URL provided by the interface:
http://localhost:5021(or whichever port you specified). - Verify the Connection: Once the configuration is saved, your AI client will handshake with MDriven. You can test the connection by asking your AI prompt a simple question, such as, “Can you list the classes in Diagram1 of my current model?”
Connecting AI assistant to MDriven MCP server
When the AI responds with the correct architecture from your MDriven Designer, you have successfully bridged the gap. Your AI is now reading directly from your live model context!
Step 3: Accelerating MCP System Design with AI Prompts
With the connection established, your AI assistant is now an active participant in your MDriven modeling workflow. Instead of manually drawing classes and defining properties, you can instruct your AI using natural language prompts and design the system using AI.
Here is how to interact with your model using the AI client:
- Generate New Classes: Prompt your AI to create specific domain entities. For example, “Create a ‘Customer’ class and an ‘Order’ class in Diagram1.”
- Define Attributes: Ask the AI to populate classes with relevant data fields, such as, “Add standard contact fields (Name, Email, Phone as Strings) to the Customer class.”
- Establish Associations: Define relationships conversationally. Try prompting, “Create a one-to-many association between Customer and Order.”
As your AI processes these requests, it communicates directly with the MDriven MCP server. You will see the new classes, attributes, and associations appear live within your selected MDriven diagram. This eliminates repetitive manual setup, allowing you to focus purely on high-level domain architecture and business logic.
Create Model Using AI Prompt
Step 4: Prototyping Instantly with Autoforms
Once your AI has generated the foundational domain model, you can immediately see it in action without writing a single line of UI code. MDriven’s Autoforms feature takes the classes, attributes, and relationships your AI just built and automatically generates a working, interactive prototype.
Here is how to bring your AI-generated model to life:
- Launch the Prototype: With your newly populated diagram open, trigger the Autoforms feature.
- Interact with the UI: MDriven instantly spins up a default user interface based on your model’s structure. If your AI created a ‘Customer’ class with specific fields, you will immediately see a form ready to accept that data.
- Iterate and Refine: If the prototype reveals missing fields or incorrect relationships, simply return to your AI client, prompt it to make the necessary structural adjustments via the MCP server, and refresh your Autoforms to see the updated UI.
Run Application and View
Step 5: Iterating and Taking Your Model Further
With your initial model generated and your Autoforms prototype running, the real power of this AI-driven workflow is how quickly you can iterate. Model-driven development is rarely a one-and-done process, and keeping your MCP connection open allows for continuous evolution.
Here is how to maintain the momentum:
- Refine Through Conversation: If your Autoforms prototype is missing a feature, do not manually rebuild it. Jump back to your AI client and prompt it to adjust the model—like adding a new
Statusattribute to theOrderclass. - Generate Business Logic: Once the structure is in place, you can use the AI to help write OCL (Object Constraint Language) expressions or action scripts directly within MDriven to enforce rules and automate behaviors.
- Deploy to Production: When your AI-assisted model is fully refined and tested in the Autoforms prototyper, you are ready to export and deploy your application using MDriven Server.
Conclusion
Integrating generative AI with MDriven Designer via the Model Context Protocol fundamentally changes how we approach software architecture. By turning your AI into a direct collaborator that manipulates your model in real-time, you move from abstract code generation to tangible, working prototypes in minutes.
Set up your MCP listening server, connect your AI, and start prompting your next great application today!
Resources:
- https://blog.mdriven.net/category/modeling/
- https://blog.mdriven.net/ai-coding-why-it-needs-more-precise-specification/